

Gingerbread (AIP, low FODMAP, Paleo, gluten free, grain free)
Autumn is officially here and it's sparked a baking frenzy in my house. It's also sparked a heated debate on the texture of gingerbread. I haven't had gingerbread for a long long time, but memory tells me that they were always slightly soft and chewy inside. My husband however insists that they are crunchy. Google tells me that this debate is not restricted to our household but it seems to be a contentious issue worldwide. Further digging informs me that traditional gingerbread is in fact soft and chewy. 1 point to me. However in the making of edible decorations and houses it should be firmer and crisper. So I guess we're even. I probably won't tell him that though.
To accommodate both our gingerbread needs, I have made some slightly softer chewy gingerbread leaves to welcome Autumn in. I am also in the process of creating a Christmas e-book of allergen free, AIP and low FODMAP recipes which will feature a festive gingerbread house made from a crunchier gingerbread. In the meantime, enjoy these warming, spiced biscuits with a nice cuppa. This makes quite a considerable amount of dough. I was able to make 17 leaves from my dough. Ingredients: 2 cups tigernut powder plus two reserved tablespoons (see link below) Half a cup of arrowroot powder plus extra for dusting. 1 teaspoon of bicarbonate of soda 2 tablespoons of ground ginger 2 teaspoons of ground cinnamon 1/2 teaspoon of ground mace A pinch of ground cloves A pinch of salt A teaspoon of vanilla powder Half a cup of maple syrup Half a cup of melted coconut oil (see link below for my favourite) 1 tablespoon of gelatin (see link below for my favourite) 2 tablespoons warm water Equipment: Baking paper Gingerbread/cookie cutters rolling pin large oven tray 2 mixing bowls Whisk Method: Preheat your oven to 180 degrees for fan assisted. In a mixing bowl sift together your tigernut flour and arrowroot. Add your ground spices, bicarbonate of soda, vanilla and salt. Mix throughly so the spices are incorporated evenly throughout the flour. In a separate bowl add your maple syrup and melted coconut oil. Add two tablespoons of warm water and sprinkle your gelatin across the surface of the liquid. Whisk immediately to avoid the gelatin clumping together. Slowly stir your liquids into your dry mix a little at a time until fully combined. You should have a firm dough that does not stick to your hands. If your dough is too sticky, add some of the reserved tigernut flour to firm the dough up. Unlike regular gingerbread dough, you do not need to leave this to rest, you want to work fairly quickly. Sprinkle arrowroot powder over your work surface to prevent your dough from sticking. Using a rolling pin, roll your dough out evenly to the thickness of a pound coin. Using your chosen cookie cutters, cut your gingerbread shapes from the dough and transfer to a large oven tray lined with baking paper. Leave an inch between biscuits to allow for them to expand a little during cooking. Bake these towards the top of the oven for 10-12 minutes. They should be golden brown and firm to touch without being too hard. Leave these to cool then devour instantly.
https://www.thetigernutcompany.co.uk/shop/new-organic-tiger-nut-powder/

0 Comments
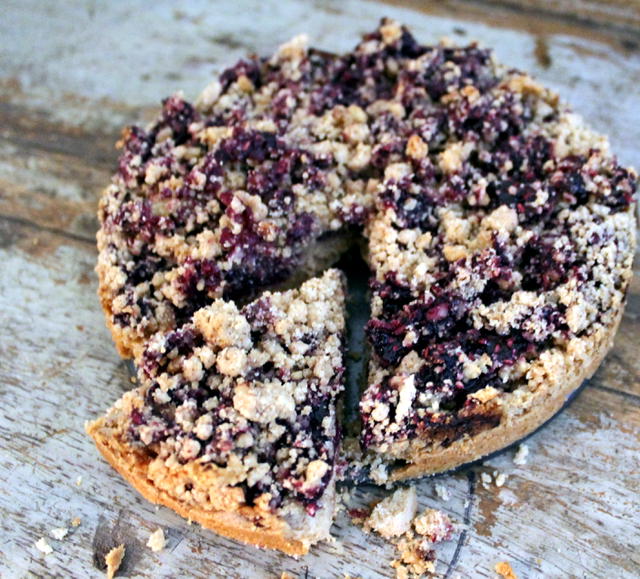
Raspberry and blueberry streusel shortcake (Paleo, AIP, low FODMAP, gluten free, dairy free, egg free)
This lovely little treat happened entirely by accident. I had over ambitiously set out to make flapjacks with a streusel topping. When it became apparent that my oat-less flapjack was going nowhere other than the bin, I whipped up a crumbly shortcake base to hold my jammy, streusel topping. There's nothing more satisfying than salvaging a baking disaster by creating something even more delicious.
Ingredients: For the base 1 cup of tigernut flour (see link below) 2 tablespoons of arrowroot powder 3 tablepoons of melted coconut oil 2 tablespoons of maple syrup Half a jar of my raspberry and blueberry jam For the streusel topping 8 tablespoons of tigernut flour 2 tablespoons of coconut oil 1 tablespoon of maple syrup A pinch of salt Equipment: You will need a loose bottom cake tin or baking tray. I used a round 15 inch tin. Preheat your oven to 200 degrees, 180 for fan assisted. Method: To make your base sift the tigernut flour and arrowroot into a mixing bowl, add your melted coconut oil, syrup and mix to form a dough. Press your dough firmly into the base of your cake tin to form an even layer. This will be about1.5 cm thick. Place this in the centre of you oven and let it bake for 15 minutes until it starts to turn golden brown. While the base is cooking you can make the topping. Place all the topping ingredients in a mixing bowl and run a fork through the mixture to combine the ingredients and create a crumb like texture. You don't want to break the pieces up too much, its nice to have some bigger chunks in there! When your base is ready, remove it from the oven and spoon over a thick even layer of jam, covering the entire base. Crumble your streusal mixture over the top of this and return the tray to the oven for a further 20 minutes. When it is ready the crumble should be golden and your jam should be starting to bubble. Leave this to cool entirely before removing from the tray. This allows the shortcake base to firm up. All that remains is to get the kettle on and enjoy a slice.
https://www.thetigernutcompany.co.uk/shop/new-organic-tiger-nut-powder/
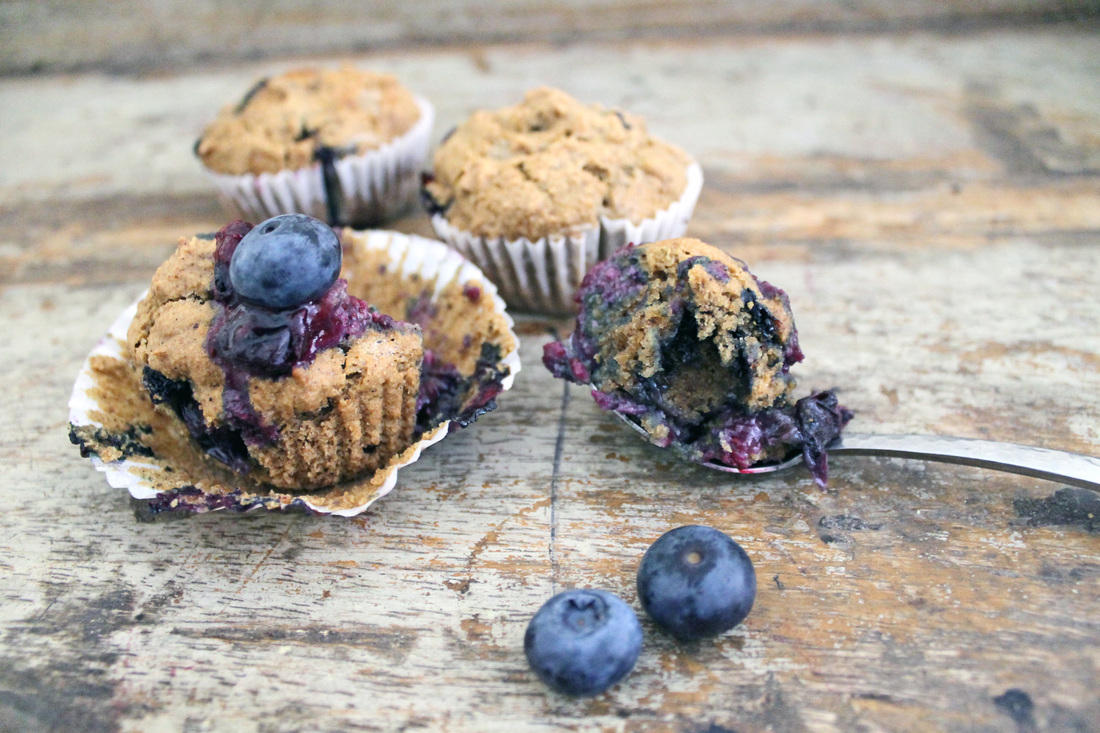
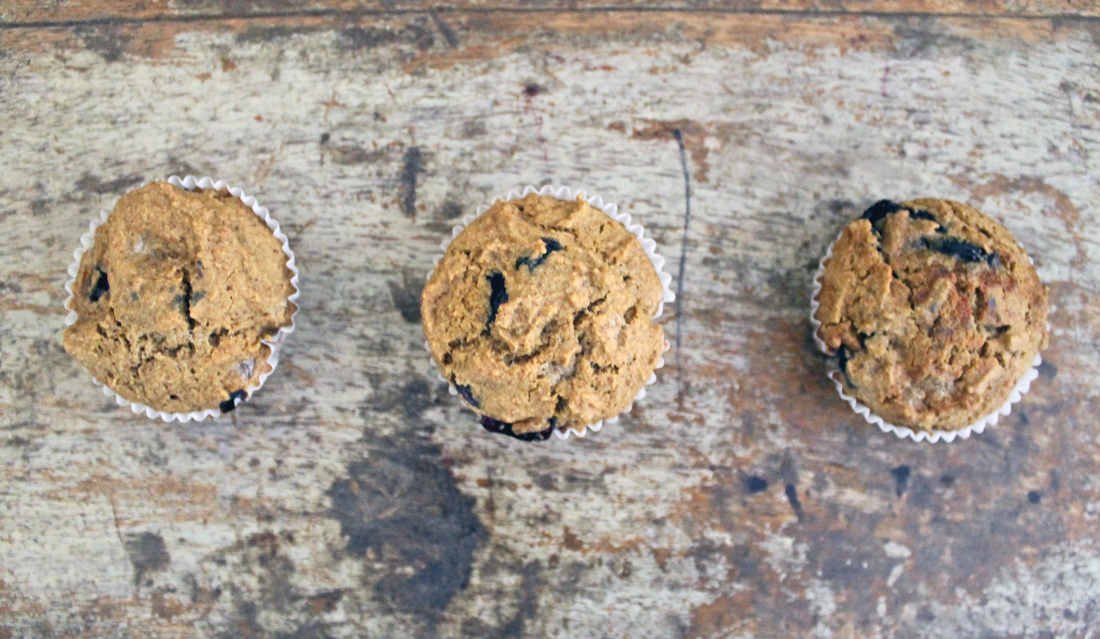
Blueberry muffins (Paleo, AIP, low FODMAP, gluten free, lactose free and egg free)
For me, creating any kind of sweet treat that is both AIP compliant and low in FODMAP's is nothing short of a miracle. The fact that these actually came out of the oven tasting just like muffins stunned me so much I had to eat 7 of them immediately just to make sure I wasn't dreaming.
The natural sweetness of tigernut flour combines well with arrowroot powder to create a moist dense sponge while the blueberries add little explosions of flavour with every mouthful. Makes 10 - 12 muffins Ingredients: Half a cup of arrowroot powder plus 1/2 tablespoon 1 and a half cups of finely ground tigernut flour plus 1 tablespoon (it is super important to use only the finely ground version - see link below) 1 teaspoon of vanilla powder (see below for the AIP compliant one I use) 1 level teaspoon of bicarbonate of soda A quarter teaspoon of salt A dessert spoon of lemon juice 1/2 cup of tigernut milk (or any lactose free milk you can tolerate) 1/4 cup of maple syrup 1 quarter cup of melted coconut oil plus a tablespoon 2 gelatin eggs - 2 tablespoons of powdered gelatin plus 9 tablespoons of warm water. (please see link for recommended gelatin below) 1/2 cup of fresh blueberries Method: Pre heat your oven to 180 degrees for fan assisted. Line a cupcake tray with individual cake cases. Sift all your dry ingredients - flour, arrowroot, bicarbonate of soda, vanilla and salt into a large bowl. In a separate bowl add half of the tigernut milk, maple syrup, melted coconut oil and lemon juice. In another bowl you will need to create your gelatin 'eggs'. Add 6 tablespoons of warm water to a bowl, followed by two tablespoons of gelatin. Whisk this immediately to ensure the gelatin dissolves and there are no lumps. Transfer the gelatin eggs to the bowl of liquids and whisk together. Slowly pour your liquid mix into your dry mix stirring as you go, ensuring everything is fully incorporated. Your batter will be fairly thick and should not be runny. If your mixture is looking too stodgy however, you can add a little of the reserved tigernut milk. You want this to be of a similar consistency to regular muffin batter. Add in your fresh blueberries stirring them evenly throughout the mixture Spoon your batter into your individual cake cases, place in the centre of your oven and bake for 25 minutes. After 25 minutes remove from the oven and allow them to cool completely so that they firm up. These will keep well in an airtight container in a cool place for up to three days and still taste just as good!
https://www.thetigernutcompany.co.uk/shop/new-organic-tiger-nut-powder/

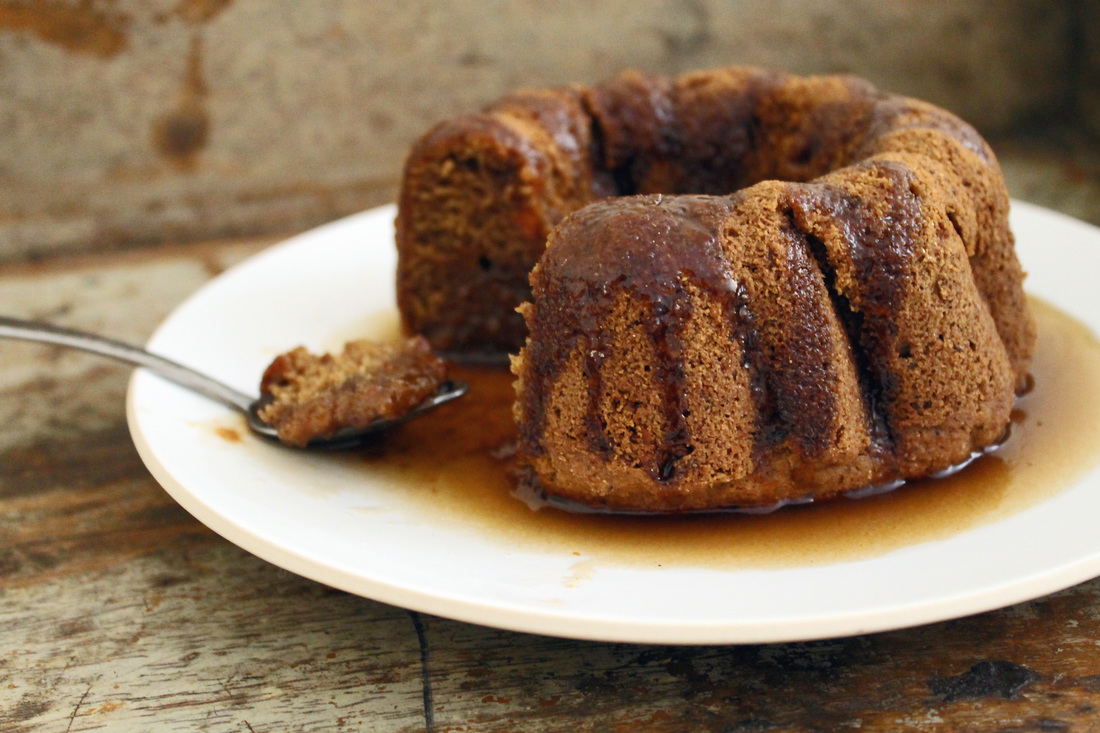
Sticky toffee pudding (Paleo, AIP, low FODMAP, dairy free, gluten free, egg free)
I thought I would attempt a sticky toffee pudding for my husbands birthday. I had visions of turning out a perfect sponge, dense enough to hold up to copious amounts of sweet rich toffee, interspersed with chewy crystallised 'dates'. I can only assume I was being guided by some kind of mystical culinary gods because against all odds, thats exactly what I made. When I took my first mouthful I was close to tears. It's probably been a good 6 years since i've eaten a sticky toffee pudding. Although AIP, low FODMAP, gluten and dairy free, this is decadent. Yes, it contains superfoods such as tigernuts and coconut oil, but this is definitely one to reserve for special occasions. I know its definitely on my Christmas baking list.
Equipment: I used a 15 inch bundt tin, but you could make this in a standard cake tin or smaller pudding moulds. I was just trying to be fancy. Ingredients: For the pudding 1 cup of arrowroot powder 2 cups of tigernut flour 1 teaspoon of vanilla powder (see below for AIP compliant version I use) 1 level teaspoon of bicarbonate of soda A pinch of salt A dessert spoon of lemon juice 1/4 cup of melted coconut oil plus one tablespoon 1/4 cup of maple syrup 2 gelatin eggs 1 cup of tigernut milk For the sticky toffee sauce 1/2 cup of maple syrup plus a tablespoon 1 and 1/2 cups of tigernut milk A quarter cup of coconut oil A pinch of salt For the dates If you are AIP only you will be able to add dates to the batter as you would a normal sticky toffee pudding. For this use 75g of chopped, pitted dates. For a low FODMAP alternative you will need: 1 medium sweet potato peeled and diced into 1 cm thick discs (this is a low fodmap portion per slice - alternatively you could use a sweet squash) 2 dessert spoons maple syrup 1 tablespoon coconut oil Method: Preheat your oven to 200 degrees, 180 fan assisted To make the low FODMAP 'dates' Place your sweet potato discs onto an oven tray and drizzle with the maple syrup and coconut oil. Bake these in the centre of the oven for 35 minutes, turning frequently and ensuring the potatoes are coated in the oil and syrup. Once baked and caramelised remove from the oven and chop into small pieces - about 1/2 cm. Leave these to one side. If you are using dates, place in a small saucepan over a medium/low heat. Cover with 75ml water and let the water come to a simmer. Cook until the dates are mushy and have absorbed all the water. To make your sponge, sift all your dry ingredients into a large mixing bowl and combine. In a separate bowl add your lemon juice, coconut oil, maple syrup and milk. In another bowl you need to make your gelatin eggs. Add 9 tablespoons of warm water and two tablespoons of gelatin powder (link below) Whisk immediately to ensure the gelatin does not clump together. Transfer the eggs to your wet ingredients and whisk thoroughly, incorporating all the liquids. Gradually pour your wet ingredients in to the dry, gently folding the flour as you go. You should have a fairly thick pudding batter - not too runny, but not overly dense. Once you have fully combined all the sponge ingredients, stir through your dates or caramelised potatoes. Spoon the batter into your cake tin and place this in the centre of the oven for 25 minutes until golden brown and firm to touch. The most important thing now is that you can scrape any remaining uncooked batter out of the bowl and lick the spoon like you did when you were a kid. It tastes EXACTLY the same. While your pudding is cooking you can make your toffee sauce. Add your coconut oil, maple syrup, salt and half a cup of tigernut milk to a medium saucepan and whisk together throughly. Turn the heat to medium low. The mixture will start to warm and thicken. Keep whisking frequently for 15 minutes until you have a reduced, rich bubbling thick caramel. At this point add in the rest of the tigernut milk and turn the heat up. You want to keep it bubbling and keep whisking until it reduces down and turns a rich toffee colour. This should take around about 8 more minutes. Once your cake is cooked through, remove from the oven to serve immediately with the hot toffee sauce. Alternatively, you can let the cake cool in the pan to serve later. If using later, re-heat your sponge by wrapping it in foil and warming through in the oven for 12 minutes. You can always reheat the toffee sauce over the hob. This pudding will keep for up to three days, but is best served warm.
https://www.thetigernutcompany.co.uk/shop/new-organic-tiger-nut-powder/
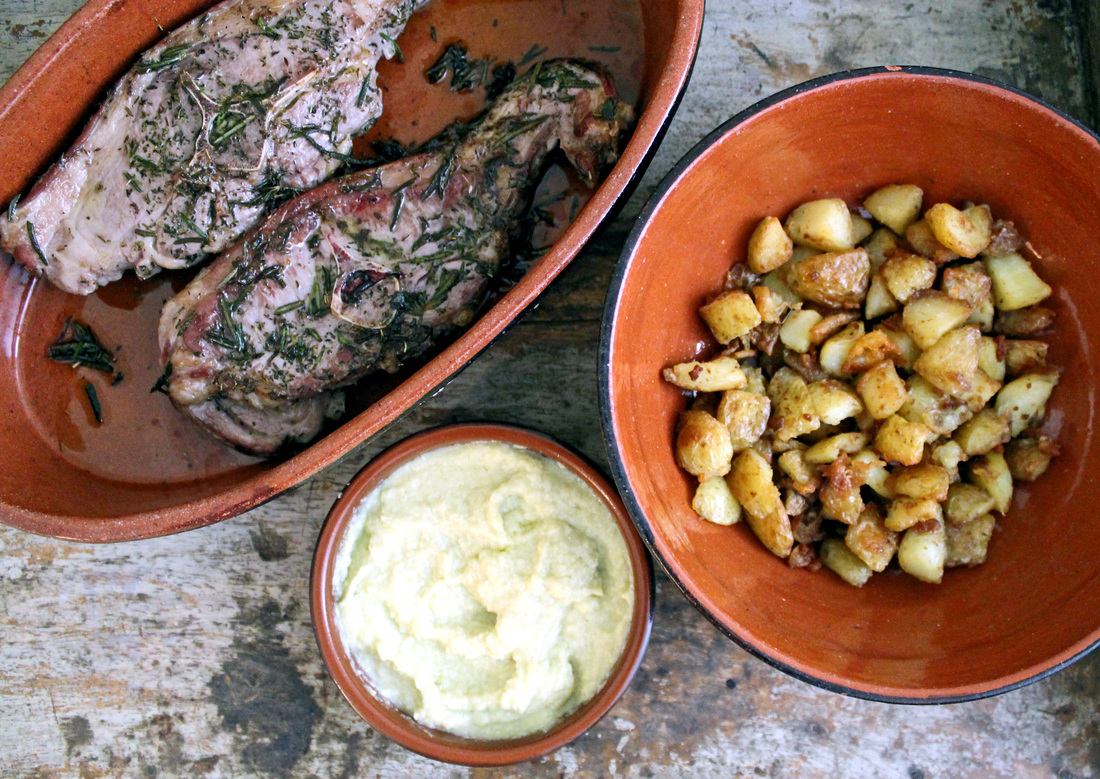
Spanish lamb chops with patatas bravas and aioli (Paleo, AIP, low FODMAP, low histamine)
Spain is one of my very favourite places. Aside from the beautiful countryside and Mediterranean coastline, I find the people so warm and welcoming. I feel totally at home there and find eating out so much easier than I do in the UK. The restaurants are incredibly knowledgeable about coeliac disease and food intolerance and it's never any effort for them to adapt dishes. In the UK I often dine out in fear. If I request a meal to be adapted I am frequently met with a blank stare, the rolling eyes of disgust or am outright told they cannot accommodate me. I think I better move to Spain.
Part of the reason I feel other European countries can handle dietary requirements better than the UK is that the food is fresh and simple. They don't dress a dish up with a multitude of unnecessary ingredients in order to create flavour. They just prepare fresh produce and use simple herbs and seasonings to enhance its natural flavour. Prior to my diagnosis I would adore sampling different tapas dishes - I couldn't get enough of the oily crispy textures of patatas bravas. In between courses I would devour slice after slice of bread smothered in aioli until I could barely breathe. Alas, those days are gone. With my potato and garlic consuming days nothing but a mere memory, I have recreated a couple of my favourite dishes and made them FODMAP friendly and AIP compliant. I have tried to capture the essence of the dishes as best I can and utilise simple ingredients full of natural flavour. Serves 2 Ingredients: For the lamb 2 grass fed lamb chops (I buy all my grassfed meat from athleat - see below for a discount code!) 2 tablespoons of extra virgin olive oil 1 tablespoon dried thyme 1 tablespoon fresh chopped rosemary A pinch of himalayan salt or sea salt For the patatas bravas If you are low FODMAP and not AIP you can use 3 large potatoes peeled and diced into small cubes For AIP use one whole swede, peeled and diced into small cubes 1 tablespoon of coconut oil 1 tablespoon of extra virgin olive oil if you are feeling extra decadent For the aioli 1 cup of drained canned artichokes half a courgette 1/3 cup of garlic oil 1/4 cup extra virgin olive oil A generous pinch of salt Method: Place your lamb chops in a sealable container or dish. Add the olive oil, thyme, rosemary and salt and ensure that the chops are thoroughly coated in the seasonings. Cover tightly and transfer to the fridge to marinade for a minimum of one hour. While the lamb is marinating, par boil your potatoes or swede over a medium heat until tender and soft around the edges. They are ready when you can easily pierce them with a knife. Drain them throughly. Heat your coconut oil in a large frying pan over a medium/low heat. Once this is really hot add your swede or potatoes to the oil and let them fry. For an extra decadent oily, crispy texture add a tablespoon of olive oil to the pan. Keep stirring to ensure they are coated in the oil and do not stick to the bottom of the pan. They should take about 20 minutes to fry over a medium/low heat. While your potatoes are frying you can make your aioli by adding all the ingredients into your blender and blitzing thoroughly until you are left with a smooth, thick creamy sauce. You want this to be as thick as mayonnaise. Add more garlic oil to taste. Remove your lamb chops from the fridge and heat a drizzle of olive oil in another frying pan over a medium heat. Once this is hot add your lamb chops and cook to your liking and brown on each side. I served mine pink in the middle, cooking for three minutes on each side. Serve the lamb, patatas bravas and aioli with a fresh green salad or my mediterranean kale. 
|

Emma CarterThis blog tells an ongoing story about me and my journey back to health and happiness. A boho soul always looking for my next European adventure. I am a Coeliac, Yogi, paleo advocate, dreamer, Bon jovi connoisseur, sun worshipper, snuggly jumper wearer and wife to my lovely Paulie. Archives
April 2017
Categories
All
|
 RSS Feed